![Oculo Logo_Logo Full_Green_L.png]](https://help.oculo.ai/hs-fs/hubfs/Oculo%20Logo_Logo%20Full_Green_L.png?height=37&name=Oculo%20Logo_Logo%20Full_Green_L.png)
When would I use this?
- You want to confirm that what has been built on site matches what was designed, without walking the site with a set of drawings
- You're planning the next phase of work and want to see what's coming in the model against what's already in place
- You've spotted a variance and you want to raise it with the site team to investigate, or with the design team so the model can be updated
Overview
Oculo has two BIM model features, and both start from the same place: a 360 scene. BIM Comparison opens a split screen with the 360 image on the left and the 3D model on the right, showing the same location in both. BIM Overlay puts the model and the 360 image into a single viewer, so the model sits on top of the reality capture and you can fade it in and out.
Both features exist to answer the same question: does what is on site match the design? You can use them proactively, to plan what is coming up, or retrospectively as an as-built verification workflow, confirming that what has been built matches what was designed. When you find a difference, you can raise it as an issue from inside either mode - either to the site team to investigate or resolve, or back to the design team to update the BIM model and issue a new version.
You can move between the two modes freely. The buttons for both sit in the top right corner of the 360 viewer, and switching from Comparison to Overlay keeps you in the same location.
Note: Both features need a 3D BIM model to have been loaded for your site. If you open a 360 scene and the BIM buttons aren't there, the model hasn't been set up for that site yet.
Opening the BIM tools
- Navigate the floor plan to the location you're interested in
- Click into a 360 scene to open the 360 viewer
- In the top right corner you'll see two buttons: BIM Comparison and BIM Overlay. Click whichever mode you want

BIM Comparison mode
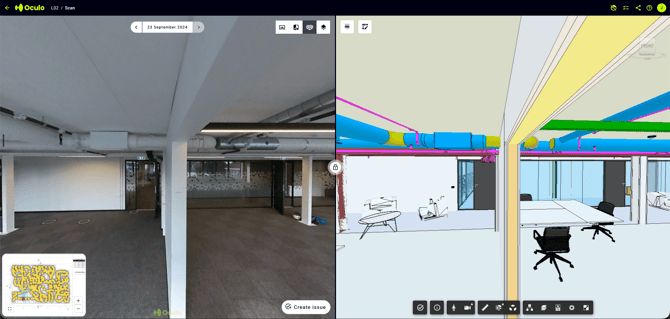
Clicking BIM Comparison opens a split-screen view of the same location: the 360 image on the left, the 3D model on the right.
Navigating with the views locked
By default the two panes are locked together:
- Click and drag in the 360 image to look around, and the 3D model follows
- Jump to a different scene using the mini-map or the floor navigation circles, and the model follows there too
Navigating the model on its own
- Click the padlock button in the middle of the screen to unlock the two panes
- Move around the 3D model independently using the W, A, S and D keys
- If you want a different navigation behaviour, change the mode from the model toolbar at the bottom of the model pane
Tip: Leave the views locked most of the time. The point of Comparison mode is that both panes show the same thing from the same position, and once you unlock and fly the model around you've lost that alignment. If you lose alignment, simply enable the lock and you will snap back to the same location.
BIM Overlay mode
BIM Overlay shows the 3D model and the 360 image in a single viewer, in the same location. Open it either by clicking BIM Overlay in the top right of the full-screen 360 viewer, or by clicking the same button while you're already in BIM Comparison mode.
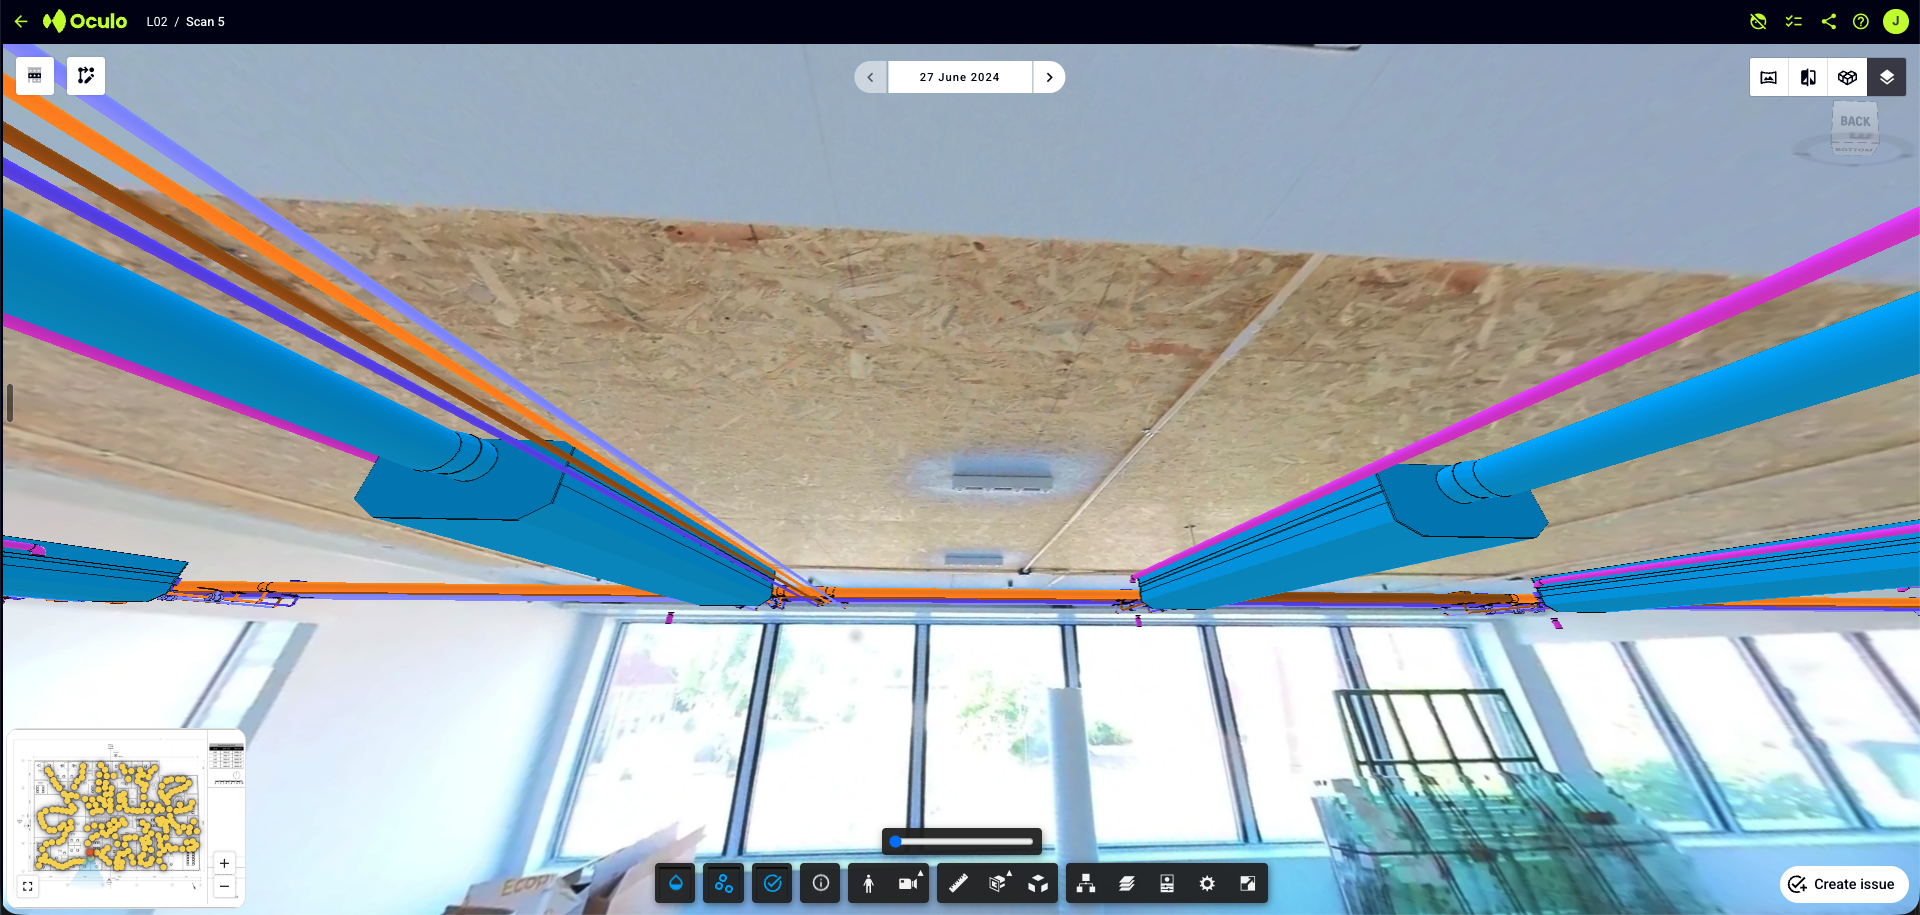
- Click and drag to look around, exactly as you would in the normal 360 viewer
- Use the slider towards the bottom middle of the screen to fade the model in and out. Fully left gives you full opacity of the 3D model. Fully right gives you full transparency, so you see the 360 image alone
- Start somewhere in the middle. A semi-transparent model lets you see the capture and the design at the same time, which is what makes a variance obvious
Isolate a single element or a small selection using the model browser, or right clicking elements, then push the slider to full opacity, and you're effectively projecting those 3D elements into the 360 scene.
Control what the model shows
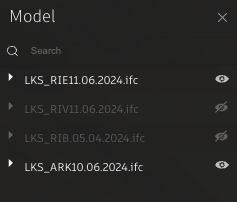
Both modes use the same BIM model tools, and the main one is the model browser. It shows the full BIM model hierarchy so you can cut the model down to whatever phase of construction you're actually reviewing - just the structural model during the structural phase, architectural layered in at facade stage, or architectural and MEP together if MEP is what you're checking.
From the model browser you can:
- Select a layer or an element to isolate it, so everything else disappears.
- Hide layers or elements to take them out of view.
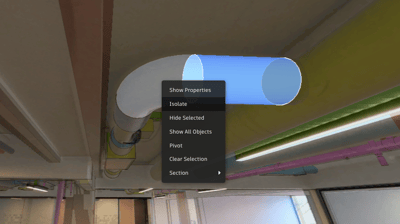
You can also work directly on the model itself:
- Right-click an element and choose Hide selected or Isolate.
- Left-click one element, then hold Shift and left-click others to build up a selection, then isolate the whole selection.
Raise an issue from either mode
When you spot a variance or something worth flagging, you don't need to leave the BIM view.
- Click Create Issue in the bottom right corner of the 360 image.
- Click and drag to draw a rectangle around what you want to highlight, the same way you would from a normal 360 scene.
- Give the issue a title, categorise it, add a description, and assign it to the relevant person.
- Click to create the issue.
Whatever is inside the rectangle becomes the issue image. In Overlay mode that means the screen grab carries the model exactly as you had it set - faded, isolated, or projected at full opacity - so the person picking the issue up sees what you saw.
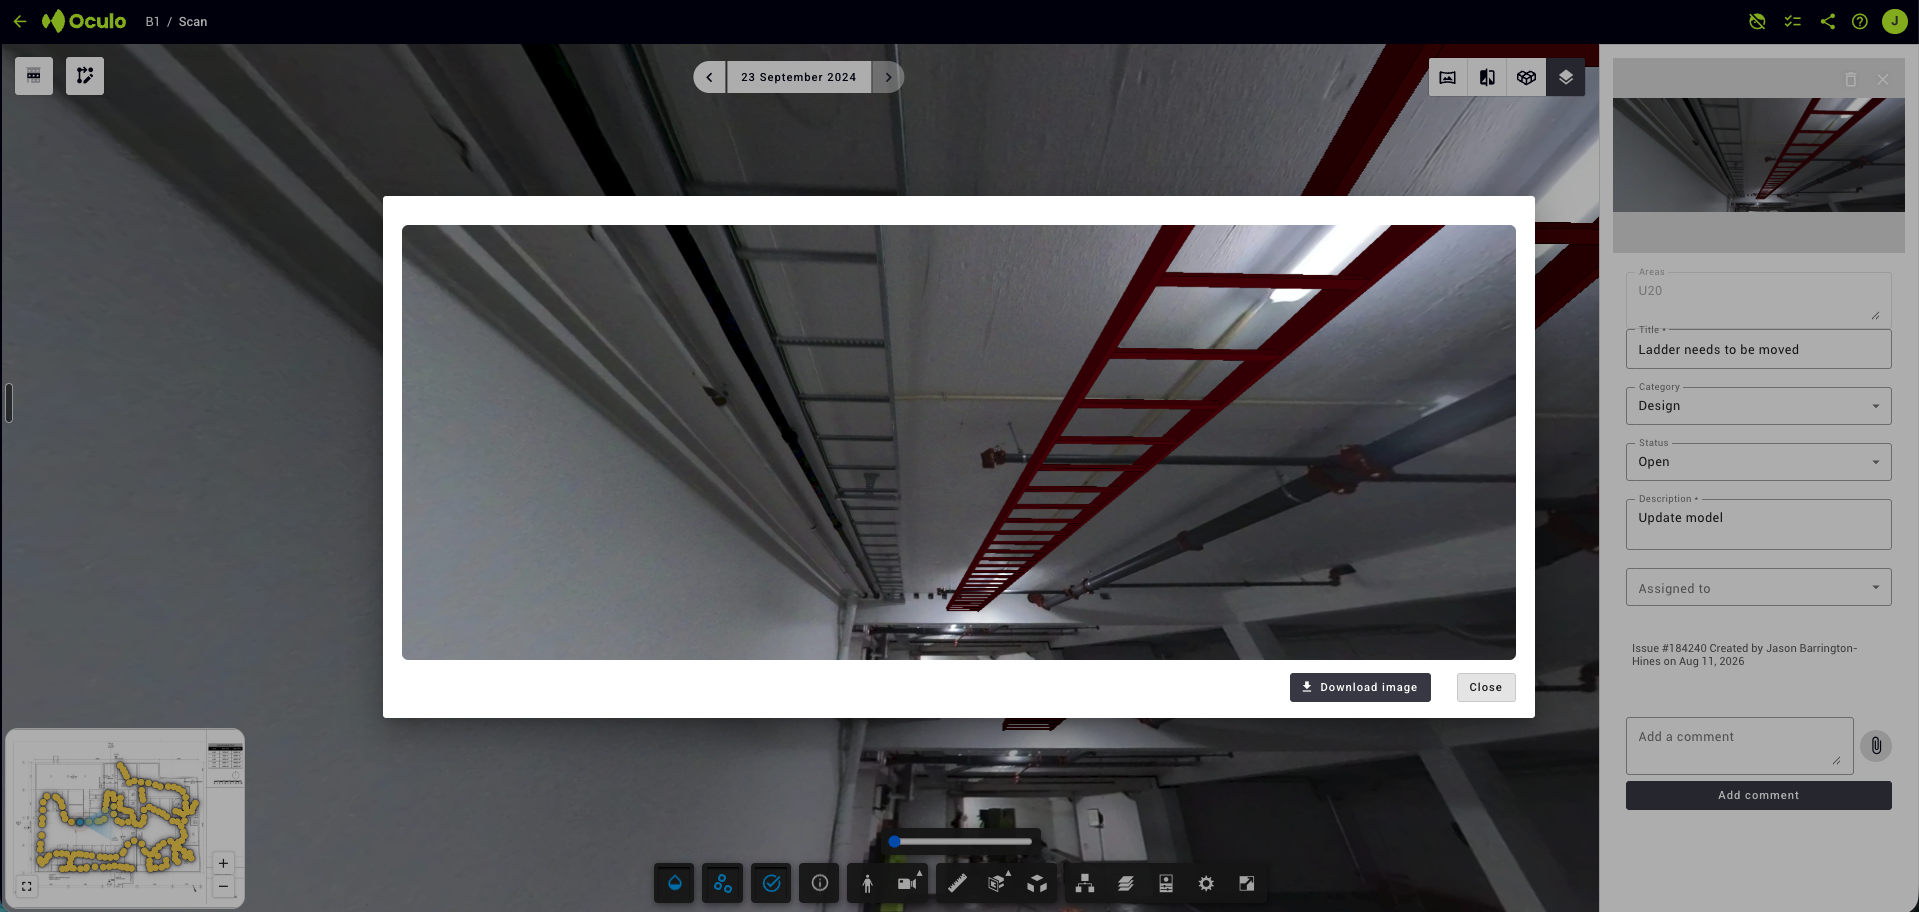
In BIM Comparison mode, drag the rectangle so it covers both the left and right panes. The image is captured as a single screen grab, so a rectangle drawn across both panes gives you one image showing the reality and the model together.
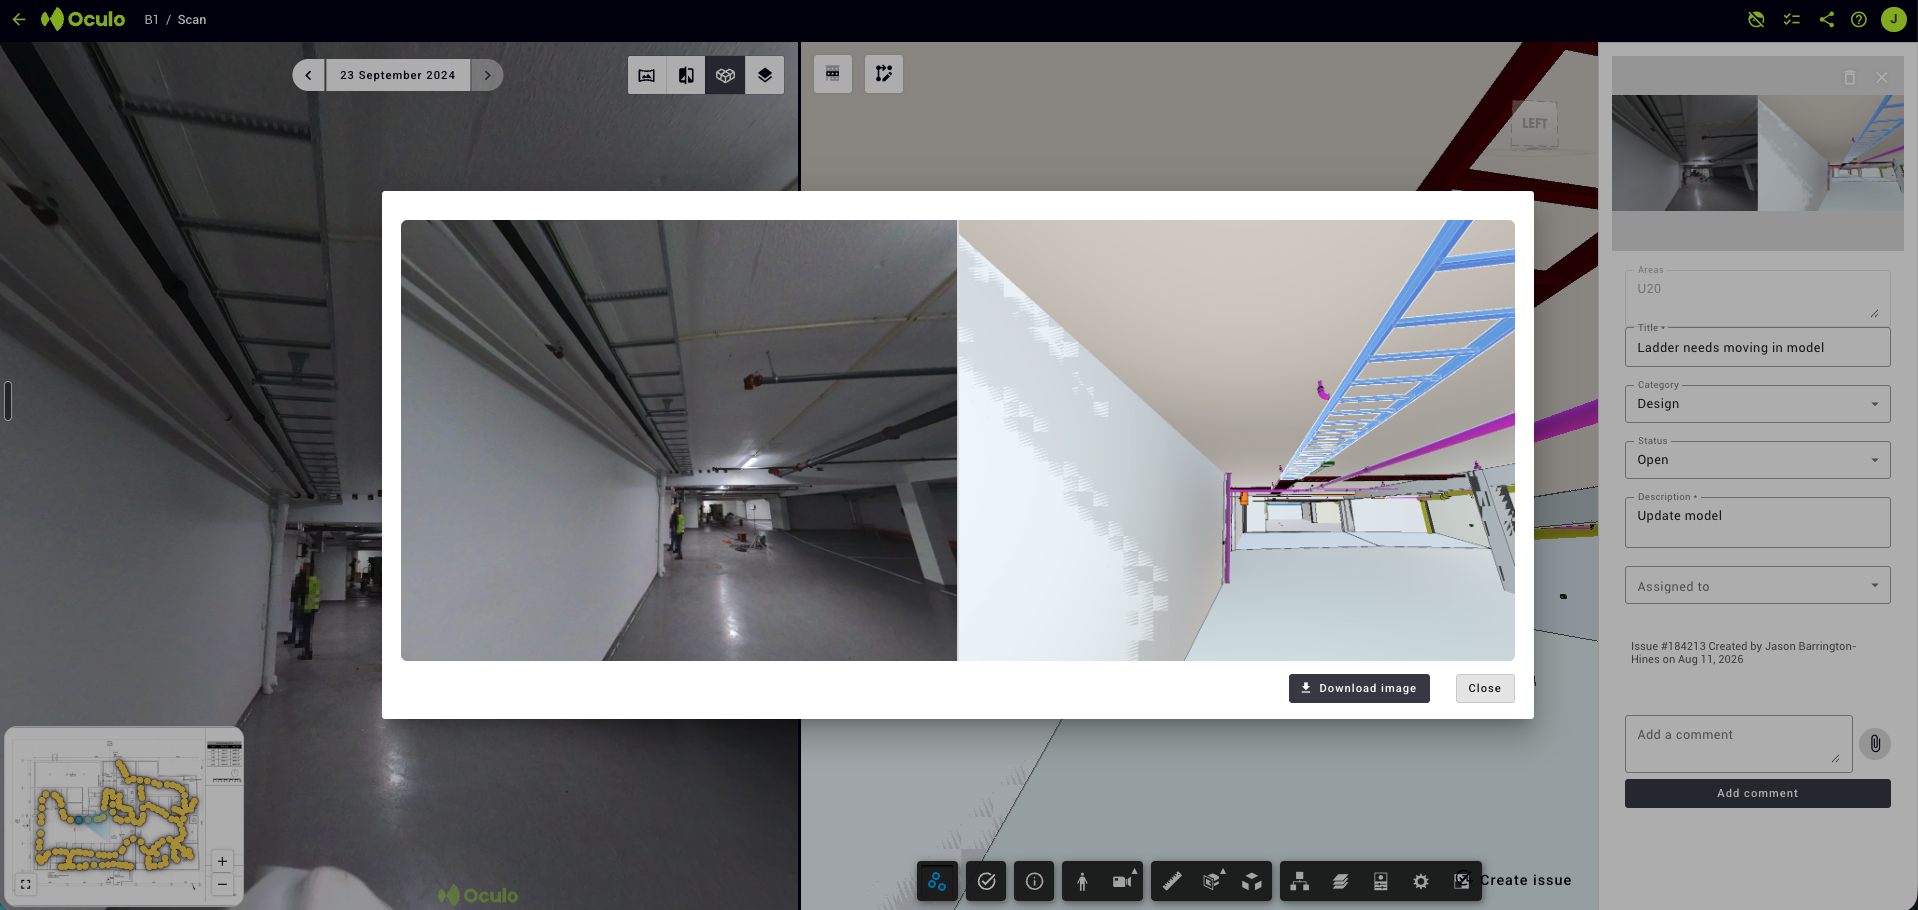
Issues raised this way flow into the issue module alongside every other issue on the site.
Related articles
- Creating and managing issues in Oculo - what happens to an issue after you raise it
- Which model version am I viewing - how to check model names
- How to update model alignment - if there is misalignment that needs correcting
Need help? Contact help@oculo.ai if you have any questions about BIM Comparison and BIM Overlay.