Steps to create an issue while viewing your scan on your screen:
1. Click "Create issue" on the bottom right of your 360 scene.
2. Select the area you want highlighted using a screen grab motion.
3. Once the highlighted area is defined, a side window will pop up with the picture on the top part and a list of items to be completed below.
4. You will be asked to type in a title.
5. You can also select a category for the issue from the drop down menu. The list can be customised to your needs.
6. You will also need to fill in the "Description *" field.
7. Once the mandatory fiels have been completed, you can press "Create Issue"
8. To later view an issue, just click on the blue dot with the tick indicating the issue's location.
9. You can "Assign to" someone that needs to see/action the issue highlighted.
10. You can also add a comment if needed using the field at the bottom of the screen.
11. Finally, you can add an attachment by clicking the attachment symbol next to the comment. This can act as support to your comment, close out action or anything else connected to the issue.
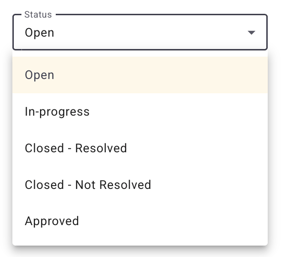
New issues have a default status of Open. The issue creator, or the issue assignee have the permission to update this status when required by clicking in the status section and selecting from the drop down list. The status can be used for filtering when reviewing issues in the Issue Dashboard.